This post may contain affiliate links. If you buy through them, we may earn a small commission at no extra cost to you.
Thanksgiving dinner does not have to come together in one frantic afternoon. The easiest way to protect your time, your oven space, and your mood is to lean on make ahead thanksgiving side dishes that can be prepped, assembled, or fully cooked days before the turkey even goes in the oven. When the sides are already handled, Thanksgiving Day becomes a simple rhythm of reheating, finishing, and actually sitting down with the people you cooked for.
This guide gives you six dependable sides that hold up beautifully to making ahead: creamy mashed potatoes, sweet potato casserole with pecan streusel, classic green bean casserole, savory herb stuffing, bright cranberry sauce, and baked mac and cheese. None are fussy, all use familiar ingredients, and together they cover the creamy, the crunchy, the sweet, and the tart.
Below you will find a timeline that spreads the work across three days, storage and reheating directions for every dish, and the food safety basics that matter when cooking in advance. Pick all six, or choose two or three — either way, the goal is less last-minute scrambling and more of the holiday itself.
Why Make-Ahead Sides Make Thanksgiving Easier
Most Thanksgiving stress is not really about cooking skill. It is about timing. The turkey needs the oven for hours, the gravy cannot be finished until the bird rests, guests arrive early and gather exactly where you need to work, and half a dozen side dishes all seem to need the same hot oven at the same moment. Making sides ahead breaks that bottleneck into small, manageable pieces.
There is a flavor benefit, too. Stuffing absorbs its seasoned broth more evenly after a rest, cranberry sauce sets and its flavors meld, and casseroles settle so they scoop neatly instead of slumping. Mashed potatoes and mac and cheese, reheated gently with a splash of dairy, come back creamy rather than tired.
Cleanup shrinks as well: the peeling, chopping, and mixing bowls are washed on a quiet Tuesday or Wednesday, not stacked in the sink mid-meal. That breathing room lets you set out drinks, finish a few simple touches of fall coffee table decor, and greet people at the door instead of calling out from behind a cloud of steam.
What Makes a Good Make-Ahead Side Dish?
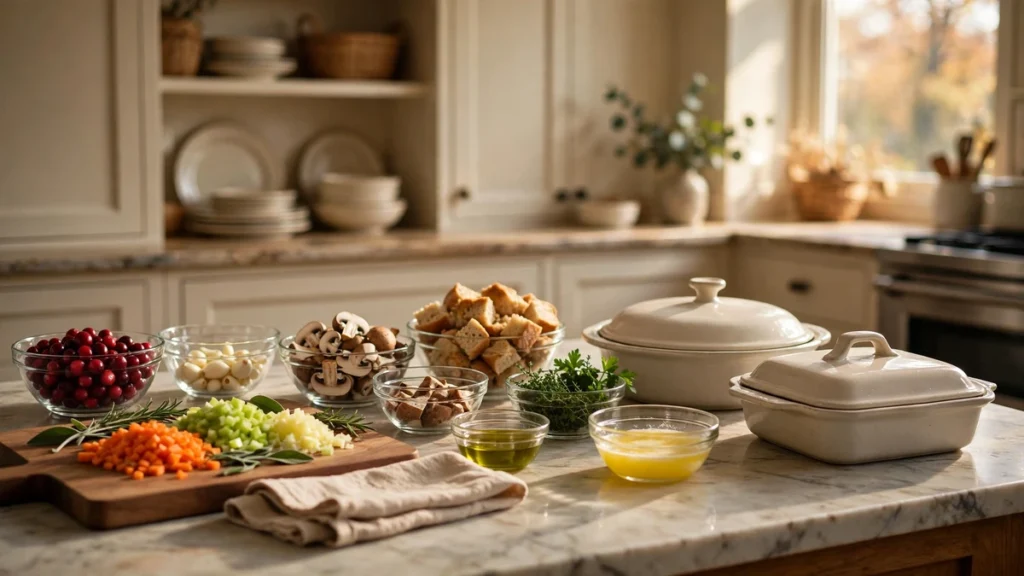
Not every recipe is a good candidate for cooking in advance, so it helps to know what to look for when you are choosing your menu.
Dishes That Reheat Gently
The best make-ahead sides are sturdy and moist: potato dishes, baked pastas, bread-based stuffings, and casseroles with a sauce. They tolerate refrigeration and reheat well covered, at a moderate temperature, with a little added liquid if they look dry. Delicate items — crisp salads, roasted vegetables that rely on caramelized edges, anything fried — are better made or finished on the day.
Components You Can Separate
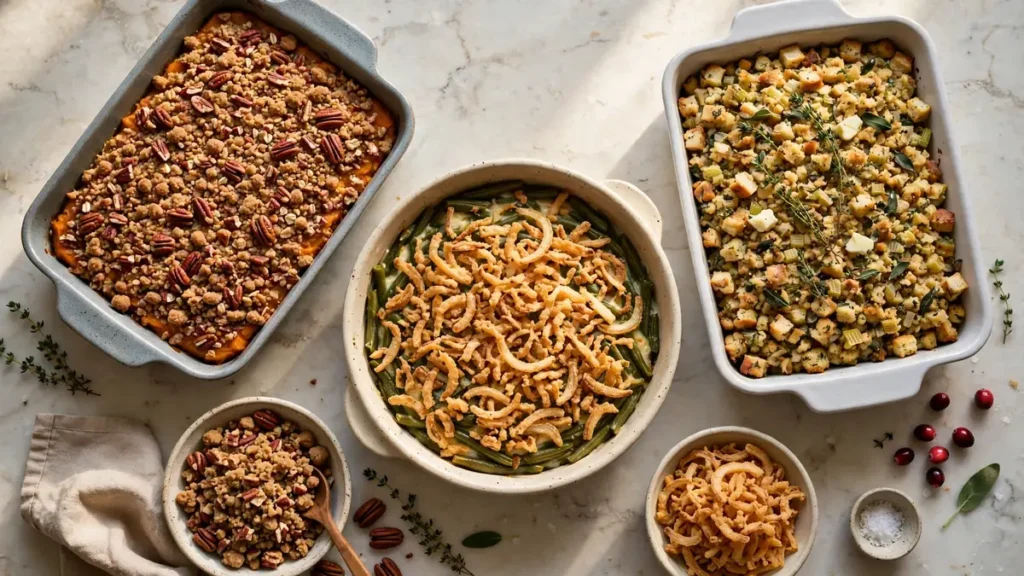
Many sides split neatly into parts. A crunchy topping almost always keeps better stored separately from a moist casserole. Make the pecan streusel and the crispy onion topping ahead, store them in airtight containers, and add them just before the final bake — the casserole stays creamy underneath, and the topping stays crisp.
Recipes That Forgive
Choose dishes that do not depend on precise, last-second timing. A casserole that is delicious anywhere between tender and deeply golden gives you flexibility when the turkey runs twenty minutes late — and turkeys often do.
Your Make-Ahead Timeline
You do not need a complicated spreadsheet. This three-day rhythm spreads out the shopping, chopping, and cooking so no single day feels heavy. Adjust it to your schedule — the cranberry sauce can be made even earlier in the week.
3 Days Before: Shop, Plan, and Make the Cranberry Sauce
- Do your main grocery shop and check you have enough butter, broth, cream, cheese, and storage containers. Running out of broth on Wednesday is a classic, avoidable problem.
- Confirm your oven plan: note which dishes bake at 350°F (175°C) and which need 375°F (190°C), and group dishes that share a temperature.
- Make the cranberry sauce. It takes about 15 minutes, keeps beautifully, and actually improves as it chills. Cool it, cover it, and refrigerate it.
- Cube the bread for the stuffing and leave it out overnight in a large bowl or on sheet pans to dry, or plan to dry it in a low oven the next day.
- If guests are staying over, this is also a low-effort moment to get the spare room ready, using a few cozy guest bedroom ideas to carry the room from Thanksgiving straight into the winter holidays.
2 Days Before: Chop and Assemble the Casseroles
- Peel and chop sturdy vegetables such as onions, celery, and sweet potatoes; store them in airtight containers in the refrigerator.
- Assemble the sweet potato casserole filling in its baking dish; make the pecan streusel separately and store it in a jar. Cover and refrigerate the dish.
- Assemble the green bean casserole without its crispy onion topping. Cover and refrigerate.
- Grate the cheeses for the mac and cheese and store them sealed. It is one of the easiest small jobs to get out of the way early.
1 Day Before: Cook the Big Three
- Make the mashed potatoes completely. Transfer them to a buttered dish, dot with a little extra butter, cover, and refrigerate.
- Assemble the stuffing in its baking dish. Cover tightly and refrigerate it unbaked, or bake it now and reheat it tomorrow — both work.
- Make the mac and cheese, transfer it to its baking dish, add the topping, cover, and refrigerate it unbaked so it finishes fresh tomorrow.
- Check that everything in the refrigerator is labeled and dated, with raw ingredients stored away from cooked dishes.
Thanksgiving Day: Reheat, Finish, and Serve
Take the casseroles and stuffing out of the refrigerator 30 to 45 minutes before they go into the oven so they are not ice-cold in the center. While the turkey rests — which conveniently frees up the oven — work through the reheating in this order:
- Stuffing: Bake covered at 350°F (175°C) for 25 to 30 minutes if already baked, or 35 to 40 minutes if unbaked. Uncover for the last 10 minutes so the top crisps.
- Sweet potato and green bean casseroles: Add their toppings, then bake at 350°F (175°C) for 25 to 35 minutes, until bubbling at the edges.
- Mac and cheese: Bake covered at 375°F (190°C) for 20 minutes, then uncovered for 10 to 15 minutes, until the top is golden.
- Mashed potatoes: Reheat covered at 350°F (175°C) for 30 to 40 minutes, stirring once halfway and adding a splash of warm milk or cream if needed. They also reheat gently in a slow cooker on Low for 2 to 3 hours, stirred occasionally, which is a useful trick when oven space is tight.
- Cranberry sauce: No reheating needed. Serve it chilled or at room temperature, straight from its dish or spooned into a small bowl.
Whatever order you use, check that reheated dishes reach 165°F (74°C) in the center with a food thermometer. That single check is the most reliable way to know a make-ahead dish is both hot and safe to serve.

Food Safety and Storage Basics
Cooking ahead is only a gift to yourself if the food is stored well. A few simple habits cover almost everything:
- Cool and refrigerate promptly. Get cooked food into the refrigerator within 2 hours of cooking. Divide large batches into shallow containers so they cool quickly and evenly.
- Keep the refrigerator cold. Your fridge should be at or below 40°F (4°C). If you are unsure of the temperature, an inexpensive appliance thermometer removes the guesswork.
- Use within a few days. Most cooked sides keep well in the refrigerator for 3 to 4 days — comfortably covering a dish made Tuesday or Wednesday for Thursday, plus leftovers.
- Freeze for longer storage. Mashed potatoes, stuffing, mac and cheese, and sweet potato casserole (without its streusel) freeze well for up to 2 to 3 months. Thaw overnight in the refrigerator before reheating.
- Reheat once, thoroughly. Bring reheated dishes to 165°F (74°C) throughout, and bring sauces and gravies to a boil. If a dish looks dry, stir in a spoonful of broth, milk, or cream rather than raising the oven temperature.
- Watch the clock at the table. Leftovers should go back into the refrigerator within 2 hours of serving — set a quiet phone reminder if your family tends to linger.
One more note on stuffing: bake make-ahead stuffing in its own dish rather than inside the turkey. It reheats evenly, crisps on top, and is far easier to bring to a safe temperature throughout.

The Recipes: 6 Make Ahead Thanksgiving Side Dishes
Each recipe serves a Thanksgiving table of eight to ten people with other dishes alongside, and every card includes its own make-ahead and storage notes.

1. Creamy Make-Ahead Mashed Potatoes
These mashed potatoes are rich, smooth, and designed to be made a day ahead. The cream cheese is the quiet trick here — it adds body and helps the potatoes reheat creamy instead of grainy or gluey.
- Prep time: 20 minutes
- Cook time: 25 minutes, plus 30–40 minutes to reheat
- Total time: About 1 hour 15 minutes, plus chilling
- Servings: 10
Ingredients
- 5 pounds (2.3 kg) russet or Yukon Gold potatoes, peeled and cut into 1½-inch chunks
- 6 cloves garlic, peeled (optional)
- 1 tablespoon kosher salt, plus more to taste
- 8 tablespoons (1 stick / 115 g) unsalted butter, plus more for the dish
- 8 ounces (225 g) cream cheese, softened and cut into pieces
- ¾ cup (180 ml) whole milk or half-and-half, warmed, plus more as needed
- ½ teaspoon black pepper
- 2 tablespoons chopped fresh chives, for serving
Instructions
- Put the potatoes and garlic in a large pot, cover with cold water by about 1 inch, and add the salt. Bring to a boil, then reduce to a steady simmer and cook for 15 to 20 minutes, until the potatoes are very tender when pierced with a fork.
- Drain well and return the potatoes to the hot pot over low heat for 1 minute, shaking gently, to steam off excess moisture.
- Add the butter and cream cheese and mash until mostly smooth. Gradually stir in the warm milk until you reach a soft, creamy consistency. Season with pepper and more salt to taste.
- Transfer to a buttered 9×13-inch (23×33 cm) baking dish, smooth the top, and dot with a little extra butter. Cool, cover tightly, and refrigerate for up to 2 days.
- To serve, let the dish sit at room temperature for 30 minutes, then bake covered at 350°F (175°C) for 30 to 40 minutes, stirring once halfway, until hot throughout at 165°F (74°C). Stir in a splash of warm milk if needed, sprinkle with chives, and serve.
Make-ahead and storage notes: Keeps refrigerated for up to 2 days before serving, or 3 to 4 days as leftovers. Freezes well for up to 2 months; thaw overnight in the refrigerator and reheat as above. A slow cooker on Low for 2 to 3 hours also reheats them beautifully — stir once or twice and check the temperature before serving.

2. Sweet Potato Casserole with Pecan Streusel
Smooth, warmly spiced sweet potatoes under a buttery, crunchy pecan topping. Assemble the filling two days ahead and keep the streusel separate so it bakes up crisp.
- Prep time: 25 minutes
- Cook time: 55 minutes
- Total time: About 1 hour 20 minutes, plus chilling
- Servings: 10
Ingredients
- 4 pounds (1.8 kg) sweet potatoes, about 5 to 6 medium
- ½ cup (100 g) packed brown sugar
- 4 tablespoons (55 g) unsalted butter, melted
- ½ cup (120 ml) whole milk
- 2 large eggs, lightly beaten
- 1 teaspoon vanilla extract
- 1 teaspoon ground cinnamon
- ½ teaspoon kosher salt
- For the streusel: ¾ cup (95 g) all-purpose flour
- ¾ cup (150 g) packed brown sugar
- 6 tablespoons (85 g) cold unsalted butter, cut into small pieces
- 1 cup (110 g) chopped pecans
- Pinch of salt
Instructions
- Heat the oven to 400°F (200°C). Pierce the sweet potatoes several times with a fork, place them on a foil-lined sheet pan, and bake for 45 to 55 minutes, until completely soft. Cool until you can handle them, then scoop the flesh into a large bowl. Reduce the oven temperature to 350°F (175°C).
- Mash the sweet potato flesh until smooth. Stir in the brown sugar, melted butter, milk, eggs, vanilla, cinnamon, and salt until well combined.
- Spread the mixture into a buttered 9×13-inch (23×33 cm) baking dish. At this point, you can cover and refrigerate the dish for up to 2 days.
- For the streusel, combine the flour, brown sugar, and salt in a bowl. Rub in the cold butter with your fingers or a pastry cutter until coarse crumbs form, then stir in the pecans. Store the streusel separately in an airtight container — in the refrigerator if made more than a day ahead.
- To bake, sprinkle the streusel evenly over the sweet potatoes and bake at 350°F (175°C) for 30 to 35 minutes, until the topping is golden and the filling is hot and set at the edges, reaching 165°F (74°C) in the center. Rest for 10 minutes before serving.
Make-ahead and storage notes: The filling keeps, covered and refrigerated, for up to 2 days; the streusel keeps separately for up to 3 days refrigerated. The unbaked filling (without streusel) freezes for up to 2 months. Leftovers keep 3 to 4 days in the refrigerator.

3. Classic Green Bean Casserole
The familiar favorite, made with a simple homemade mushroom sauce instead of a can — though the method is just as easy, and the casserole assembles perfectly a day or two ahead. Add the crispy onions at the end so they stay crisp.
- Prep time: 20 minutes
- Cook time: 35 minutes
- Total time: About 55 minutes, plus chilling
- Servings: 8
Ingredients
- 2 pounds (900 g) fresh green beans, trimmed and cut in half, or frozen green beans, thawed
- 2 tablespoons unsalted butter
- 12 ounces (340 g) cremini or white mushrooms, sliced
- 2 cloves garlic, minced
- 2 tablespoons all-purpose flour
- 1 cup (240 ml) low-sodium chicken or vegetable broth
- 1 cup (240 ml) half-and-half
- ½ teaspoon kosher salt, plus more for the blanching water
- ¼ teaspoon black pepper
- 1½ cups (about 85 g) store-bought crispy fried onions, divided
Instructions
- Heat the oven to 375°F (190°C). Bring a large pot of salted water to a boil. Cook the green beans for 4 to 5 minutes, until bright green and just tender-crisp. Drain and rinse under cold water to stop the cooking.
- In a large skillet, melt the butter over medium-high heat. Cook the mushrooms, stirring occasionally, for 5 to 6 minutes, until they release their liquid and begin to brown. Add the garlic and cook for 30 seconds.
- Sprinkle in the flour and stir for 1 minute. Slowly pour in the broth and half-and-half, stirring constantly, and simmer for 3 to 4 minutes, until the sauce thickens enough to coat a spoon. Season with salt and pepper.
- Fold the green beans and ½ cup of the crispy onions into the sauce. Transfer to a buttered 9×13-inch (23×33 cm) baking dish or a 3-quart casserole. Cover and refrigerate for up to 2 days, if making ahead.
- To bake, let the dish stand at room temperature for 30 minutes. Bake uncovered at 375°F (190°C) for 20 to 25 minutes, until bubbling and hot throughout at 165°F (74°C). Scatter the remaining crispy onions over the top and bake for 3 to 5 minutes more, until golden.
Make-ahead and storage notes: Assemble (without the final onion topping) up to 2 days ahead, covered and refrigerated. If using frozen beans, there is no need to blanch them — thaw and pat them dry first so the sauce does not thin out. Leftovers keep 3 to 4 days refrigerated; the topping will soften, which most people at the leftovers stage do not mind at all.
4. Savory Herb Stuffing (Dressing)
Buttery, well-seasoned, crisp on top and tender underneath — and much easier to manage than stuffing cooked inside the bird. Whether you call it stuffing or dressing, baking it in its own dish is what makes it a reliable make-ahead side.
- Prep time: 25 minutes
- Cook time: 40 minutes
- Total time: About 1 hour 5 minutes, plus bread-drying and chilling time
- Servings: 10
Ingredients
- 1 pound (450 g) sturdy white or sourdough bread, cut into ¾-inch cubes, about 10 cups
- 8 tablespoons (1 stick / 115 g) unsalted butter, plus more for the dish
- 1 large yellow onion, finely chopped
- 3 celery stalks, finely chopped
- 3 cloves garlic, minced
- 2 tablespoons chopped fresh sage, or 2 teaspoons dried sage
- 1 tablespoon fresh thyme leaves, or 1 teaspoon dried thyme
- ¼ cup (15 g) chopped fresh parsley
- 2½ to 3 cups (600–700 ml) low-sodium chicken or vegetable broth
- 2 large eggs, lightly beaten
- 1 teaspoon kosher salt
- ½ teaspoon black pepper
Instructions
- Dry the bread: spread the cubes on two sheet pans and leave them out overnight, or bake at 300°F (150°C) for 20 to 25 minutes, stirring once, until dry to the touch but not browned. Transfer to a very large bowl.
- Melt the butter in a large skillet over medium heat. Cook the onion and celery with a pinch of salt for 7 to 8 minutes, until soft. Add the garlic, sage, and thyme and cook for 1 minute more.
- Scrape the vegetables and all the butter over the bread. Add the parsley, salt, and pepper and toss. Whisk the eggs into 2½ cups of broth and pour it over the bread a little at a time, tossing gently, until the cubes are evenly moist but not soggy. Add more broth only if there are dry pockets.
- Transfer to a buttered 9×13-inch (23×33 cm) baking dish and press down lightly. Cover tightly and refrigerate for up to 1 day, if making ahead.
- To bake, let the dish stand at room temperature for 30 minutes. Bake covered at 350°F (175°C) for 25 minutes, then uncover and bake for 15 to 20 minutes more, until the top is crisp and golden and the center reaches 165°F (74°C).
Make-ahead and storage notes: The bread can be dried and the vegetables chopped 2 days ahead. The assembled, unbaked stuffing keeps 1 day in the refrigerator. Baked stuffing also freezes well for up to 2 months; thaw overnight and reheat, covered, at 350°F (175°C) until it reaches 165°F (74°C), adding a splash of broth if it seems dry.
5. Homemade Cranberry Sauce
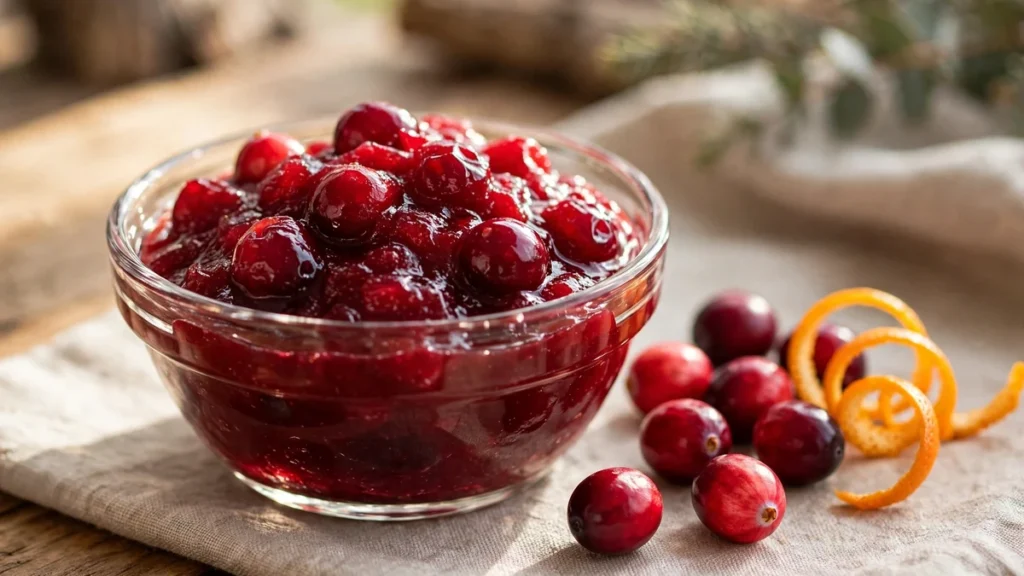
Bright, tart-sweet, and ready in about 15 minutes, this is the first dish you should make — it needs time to chill and set, and it keeps longer than any other side on the table. A little orange zest makes it taste fresh rather than heavy.
- Prep time: 5 minutes
- Cook time: 12 minutes
- Total time: About 20 minutes, plus at least 2 hours to chill
- Servings: 8 (about 2 cups)
Ingredients
- 12 ounces (340 g) fresh or frozen cranberries, rinsed and picked over
- ¾ cup (150 g) granulated sugar, plus more to taste
- ¾ cup (180 ml) water
- ¼ cup (60 ml) orange juice
- 1 teaspoon orange zest
- Pinch of kosher salt
- ¼ teaspoon ground cinnamon (optional)
Instructions
- Combine the sugar, water, orange juice, and salt in a medium saucepan and bring to a simmer over medium heat, stirring until the sugar dissolves.
- Add the cranberries, orange zest, and cinnamon, if using. Simmer gently for 10 to 12 minutes, stirring occasionally, until most of the berries have burst and the sauce has thickened slightly. It will look a little loose; it sets as it cools.
- Taste and add a spoonful more sugar if you prefer it sweeter. Remove from the heat and let cool to room temperature.
- Transfer to a serving bowl or a sealed container and refrigerate for at least 2 hours, and ideally overnight, until set. Serve chilled or at room temperature.
Make-ahead and storage notes: This is the make-ahead champion of the menu — make it up to a week ahead, covered and refrigerated. It also freezes well for up to 2 months; thaw overnight in the refrigerator. Leftover sauce is excellent on sandwiches, stirred into yogurt, or warmed and spooned over ice cream.
6. Baked Mac and Cheese
Creamy underneath, golden and crisp on top, and a guaranteed empty dish — especially if there are kids at the table. Assemble it the day before and bake it fresh on Thanksgiving so the sauce stays silky and the topping stays crunchy.
- Prep time: 20 minutes
- Cook time: 30 minutes
- Total time: About 50 minutes, plus chilling
- Servings: 10
Ingredients
- 1 pound (450 g) elbow macaroni or cavatappi
- 6 tablespoons (85 g) unsalted butter, plus more for the dish
- ⅓ cup (40 g) all-purpose flour
- 4 cups (950 ml) whole milk, warmed
- 1 teaspoon kosher salt
- ½ teaspoon mustard powder
- ¼ teaspoon smoked paprika, plus more for the top
- ¼ teaspoon black pepper
- 3 cups (340 g) shredded sharp cheddar cheese
- 1 cup (115 g) shredded Gruyère or Monterey Jack cheese
- ¾ cup (40 g) panko breadcrumbs
- 1 tablespoon melted butter, for the topping
Instructions
- Cook the pasta in well-salted boiling water for 1 to 2 minutes less than the package directions for al dente — it will finish in the oven. Drain and set aside.
- In a large pot or Dutch oven, melt the butter over medium heat. Whisk in the flour and cook for 1 to 2 minutes, until it smells lightly toasted. Gradually whisk in the warm milk and cook, whisking often, for 5 to 6 minutes, until the sauce thickens and coats the back of a spoon.
- Remove from the heat and stir in the salt, mustard powder, paprika, and pepper. Add the cheeses a handful at a time, stirring until melted and smooth.
- Fold in the pasta, then transfer to a buttered 9×13-inch (23×33 cm) baking dish. Toss the panko with the melted butter and sprinkle it over the top, with a dusting of paprika. Cover and refrigerate for up to 1 day, if making ahead.
- To bake, let the dish stand at room temperature for 30 to 45 minutes. Bake covered at 375°F (190°C) for 20 minutes, then uncovered for 10 to 15 minutes, until bubbling and golden and hot throughout at 165°F (74°C). Rest for 10 minutes before serving so the sauce settles.
Make-ahead and storage notes: Assemble up to 1 day ahead; keep the panko topping on from the start, or add it just before baking for maximum crunch. Leftovers keep 3 to 4 days refrigerated and reheat well in a 350°F (175°C) oven with a splash of milk stirred in. The assembled, unbaked dish freezes for up to 2 months.
Small Tips That Make Reheating Day Go Smoothly
Label everything. A strip of tape with the dish name, the date it was made, and its baking temperature saves real confusion on a busy day, especially if someone else is helping in the kitchen.
Bring dairy to the rescue. Mashed potatoes, mac and cheese, and green bean casserole can all tighten up in the refrigerator. A splash of warm milk, cream, or broth stirred in during reheating brings back their texture — add less than you think you need.
Use the resting turkey window. The turkey’s 30 to 45 minutes of resting is exactly when your sides should be in the oven. Plan backward from dinner, put the longest-reheating dishes in first, and trust a thermometer over the clock alone.
Keep one dish warm in a slow cooker. Mashed potatoes or stuffing held on Low or Warm frees an oven rack. Stir occasionally, keep the lid on between servings, and check that the food stays steaming hot.
Think ahead to leftovers. Leftover turkey and cranberry sauce make a wonderful sandwich, and the same comfort logic applies to a classic chicken pot pie later in the week, when a bubbling, make-ahead-friendly dinner is exactly what everyone wants.
Frequently Asked Questions
How far in advance can I make Thanksgiving side dishes?
It depends on the dish. Cranberry sauce can be made up to a week ahead, sweet potato and green bean casseroles assembled 2 days ahead, mashed potatoes made 1 to 2 days ahead, and stuffing and mac and cheese assembled 1 day ahead and baked on the day. When in doubt, assemble early and bake late.
How do I reheat make-ahead sides without drying them out?
Reheat covered with foil at a moderate temperature — 350°F (175°C) for most dishes — so the food warms through gently instead of drying at the edges. Stir in a splash of milk, cream, or broth if a dish looks tight, uncover only for the last few minutes to refresh the top, and confirm the center has reached 165°F (74°C) before serving.
Can I freeze Thanksgiving side dishes?
Yes, several of them. Mashed potatoes, stuffing, mac and cheese, sweet potato casserole filling, and cranberry sauce all freeze well for up to 2 to 3 months in airtight containers. Keep crisp toppings separate and add them fresh after thawing. Thaw frozen sides overnight in the refrigerator, then reheat them as you would a refrigerated dish, allowing a little extra time.
How long can Thanksgiving sides sit out at the table?
Follow the 2-hour rule: perishable food should not sit at room temperature for more than 2 hours. That applies on cooking day, too — refrigerate cooked dishes within 2 hours of making them, and do the same with leftovers once the meal winds down. Food that has sat out longer than that should be discarded rather than saved.
Should I cook stuffing inside the turkey if I am making it ahead?
No — bake make-ahead stuffing in its own dish. It reheats more evenly, develops a crisp top, and is much easier to bring to 165°F (74°C) all the way through. If you love the flavor of stuffing cooked with the bird, stir a few spoonfuls of warm turkey drippings or broth into your dish of stuffing just before serving.
Conclusion
A calm Thanksgiving is rarely an accident. It is usually a few dishes quietly finished on Tuesday and Wednesday, a refrigerator of labeled containers, and an oven plan that fits on an index card. Thanksgiving Day then shrinks to its best parts: a resting turkey, hot sides coming out of the oven in turn, and time to enjoy them.
Start with two or three of these make ahead thanksgiving side dishes this year if six feels like a lot, and notice how different the day feels. Then, once the leftovers are packed away, the season turns quickly — you might find yourself browsing Christmas dessert recipes for December baking, planning a gathering with Christmas party recipes, or setting aside a quiet afternoon for gingerbread house ideas with family. And if all that cooking earns you an evening off, there is no shame at all in settling into a cozy reading chair with a slice of pie and letting someone else do the washing up.

One last piece of advice before you shop: read each recipe once, start to finish, before you write the list. Notice the butter, broth and cream that repeat across the dishes, and buy a little extra of each. Hosts who lean on make ahead thanksgiving side dishes learn quickly that the plan matters as much as the recipes. Choose your make ahead thanksgiving side dishes, note their baking temperatures side by side, and your make ahead thanksgiving side dishes will reward you with a calm, well-fed holiday.
Two final notes from our kitchen tests. First, write the reheating order on a sticky note for the fridge door; even familiar make ahead thanksgiving side dishes are easier to land when the sequence is visible. Second, for the storage windows and reheating temperatures used throughout this guide, we follow the USDA guidance on leftovers and food safety, which is the standard reference for questions about make ahead thanksgiving side dishes and holiday leftovers alike.