Shop from Amazon: jute twine
Dried Orange Garland DIY: The Low-Oven Method That Doesn’t Burn
A dried orange garland DIY takes 3 to 5 hours in a low oven at 170–200°F (75–95°C), 8 to 12 hours in a dehydrator at 130–135°F, or about 2 to 3 hours in an air fryer at 170–180°F in small batches. Slice the oranges 1/4 inch thick, blot them dry, flip every 30 to 45 minutes, and take them out when they feel papery and stiff, not tacky. That is the whole project: low heat, even slices, and patience.
I keep a dried orange garland on my kitchen window from early December into January, and guests ask about it more than the tree or the mantel. The slices look like stained glass, cost less than a takeaway coffee, and smell faintly of Christmas for a week. They taught me more from failure than success — which is why this dried orange garland DIY starts with what goes wrong.
My First Batch Burned — Here’s What I Changed
The first time I tried this dried orange garland DIY, I set the oven to 250°F because a blog I trusted said “low and slow” without saying what low meant. Two hours later I had dark, bitter-smelling crisps that curled into cups and snapped when threaded. The second batch I sliced nearly half an inch thick, and the centres stayed damp, then went mouldy in storage. Batch three worked. The difference was a thermometer check (my oven runs 15°F hot), slices cut to a true 1/4 inch, and a timer every 30 minutes so I actually flipped them. That garland lasted two full seasons. If your oven runs hot, start at 170°F and add time rather than heat.
Oven vs Dehydrator vs Air Fryer: Which Method Suits You
Most dried orange garland DIY posts cover the oven only, leaving dehydrator and air-fryer owners guessing. Here is the comparison, checked against extension-service ranges for drying fruit.
| Method | Temperature | Time | Best for |
|---|---|---|---|
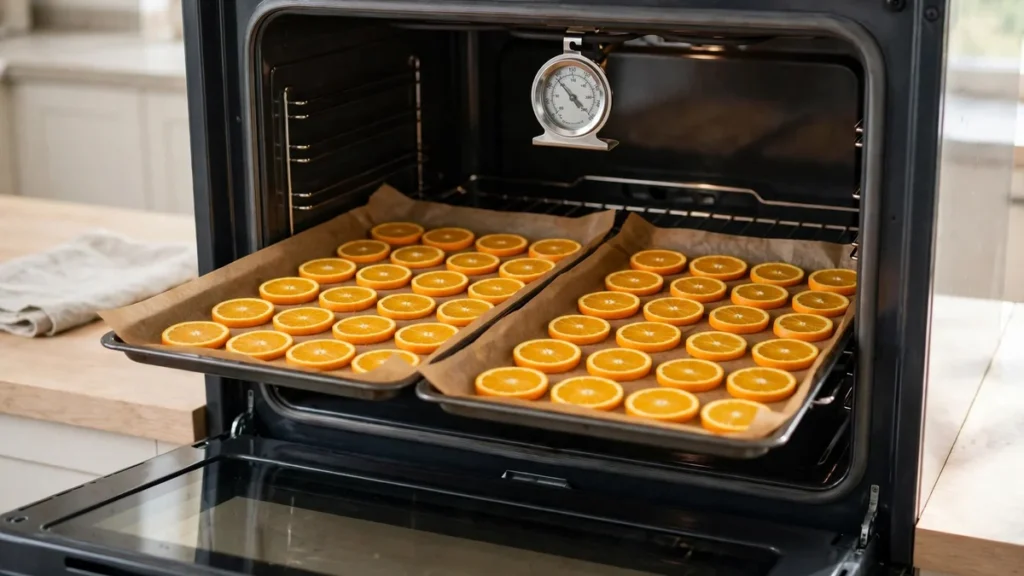
| Low oven | 170–200°F (75–95°C) | 3–5 hours | Most people; biggest batches; best colour control |
| Dehydrator | 130–135°F (55–57°C) | 8–12 hours | Hands-off drying; even results; overnight runs |
| Air fryer | 170–180°F (77–82°C) | 2–3 hours, in batches | Small garlands; renters; one-window strands |
The oven suits most readers: two trays hold roughly 40 to 50 slices, enough for a 6-foot dried orange garland. The dehydrator is most consistent — its fan replaces your flipping schedule. The air fryer is fastest per slice but slowest per garland, fitting only 6 to 8 slices per batch; stacked slices steam instead of drying.
Supplies for a 6-Foot Dried Orange Garland DIY
- 5 to 6 firm navel oranges (about 2 pounds / 900 g) — firm fruit slices cleanly; soft fruit tears
- 1 sharp chef’s knife or a mandoline with a guard
- 2 rimmed baking sheets, parchment paper, and 2 wire cooling racks if you have them
- Paper towels or a clean linen towel for blotting
- 7 feet of natural jute twine (6 feet of garland plus a 6-inch loop at each end)
Use navel oranges: they give the prettiest cross-sections and a rind that holds its shape. Blood oranges dry darker, which reads as brown in window light.
The Anti-Browning System: Five Rules That Keep Slices Golden
Browning is heat plus sugar plus time. Follow all five rules and your dried orange garland DIY comes out amber and translucent.
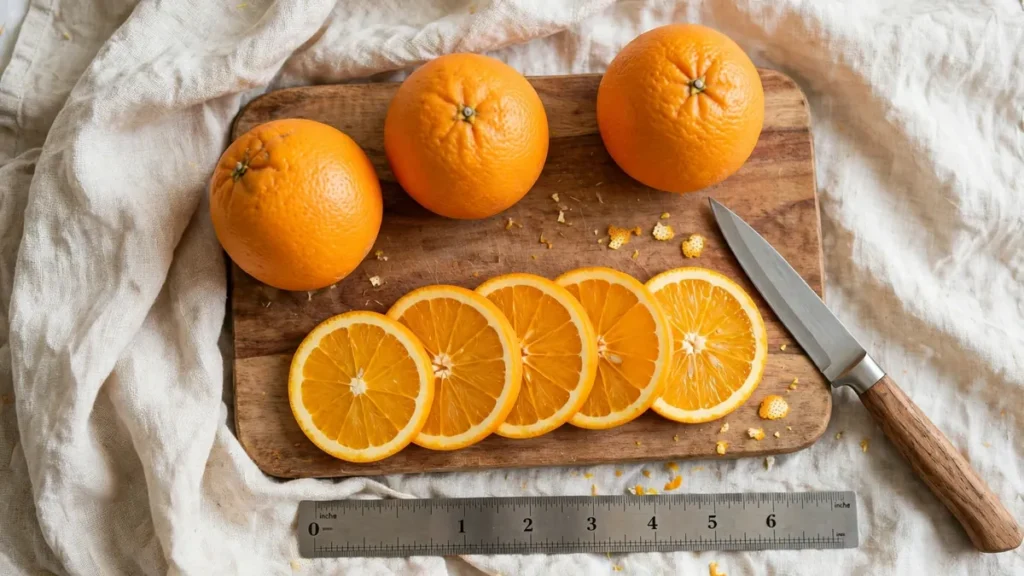
1. Slice at exactly 1/4 inch. Thinner than 1/8 inch, slices scorch; thicker than 3/8 inch, centres stay wet while edges brown. Measure the first three slices with a ruler; discard end caps, which curl first.
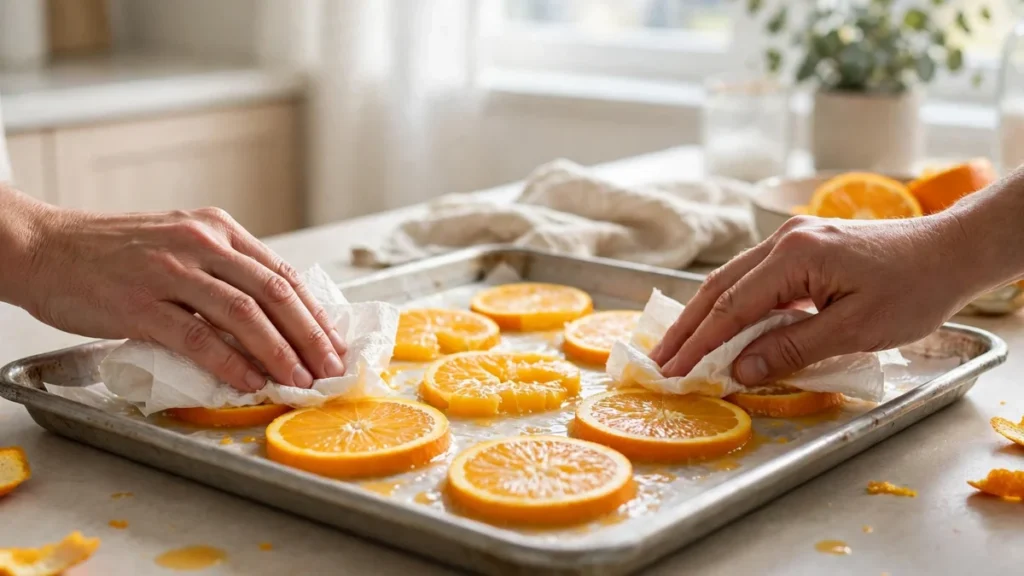
2. Blot twice. Lay slices on paper towels, press a second towel on top, wait two minutes, then blot again with a dry towel. Every drop removed is drying time saved.
3. Stay at or below 200°F. This matters most. Above 200°F the orange’s sugars caramelise, then burn — that is the brown colour, starting at the edges. If your oven’s lowest setting is 225°F, prop the door open an inch with a wooden spoon.
4. Flip on a schedule. Every 30 minutes for the first two hours, then every 45 minutes. Flipping stops sticking, dries both faces evenly, and lets you pull thin slices out early.
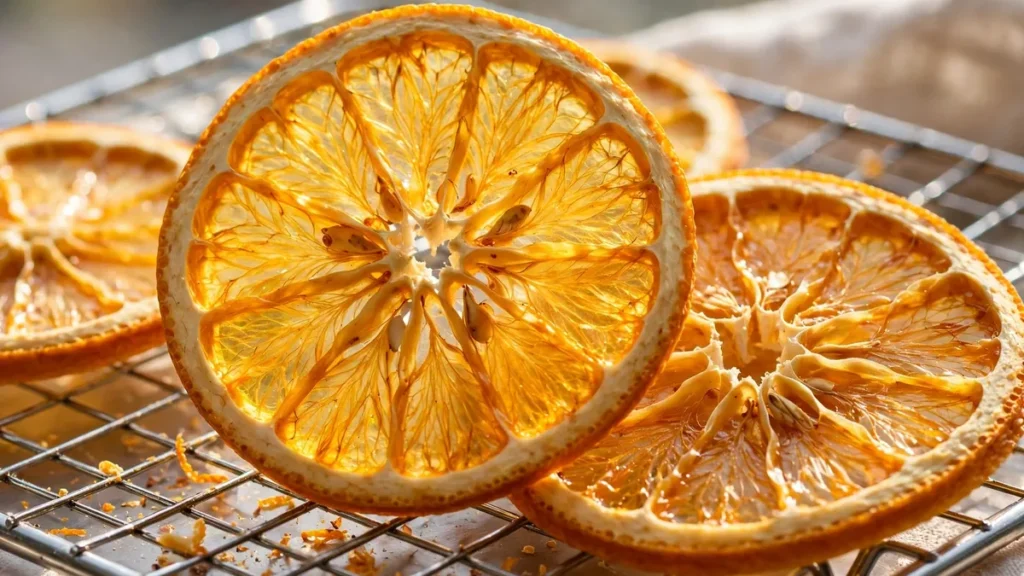
5. Use the cool-down dryness test. Hot slices always feel softer than they are. Cool one for 10 minutes, then bend it. It should feel papery and stiff, with no tackiness. If it bends like leather and springs back, give it 30 to 45 minutes more.
Step-by-Step: How to Make a Dried Orange Garland DIY
Step 1 — Prep the oranges (15 minutes)
Wash 5 to 6 navel oranges and dry them well. Cut about 1/4 inch off each end so the fruit sits flat. Slice across the equator into 1/4-inch rounds, measuring the first few with a ruler. Expect 8 to 10 slices per orange, 40 to 50 in total. Discard end caps and any slice thinner than 1/8 inch.
Step 2 — Blot and arrange (10 minutes)
Blot twice as above, then lay slices in a single layer on parchment-lined sheets, at least 1/2 inch apart — touching slices trap moisture and dry into one stuck sheet. On wire racks, airflow underneath cuts about 30 minutes.
Step 3 — Dry low and slow (3 to 5 hours in the oven)
Preheat to 180°F (82°C). Set a 30-minute timer; flip every slice at each timer, rotating trays top-to-bottom. After two hours, switch to 45-minute intervals. Start the cool-down test at 3 hours; most batches finish in 3 to 4 hours.
Shop from Amazon: wire cooling racks
Shop from Amazon: oven thermometer
Step 4 — Cool completely (30 minutes)
Turn the oven off and cool slices on wire racks for at least 30 minutes. Do not string warm slices: they tear, and trapped warmth turns to condensation in storage. Now sort — keep the most even, golden slices for the window garland, and the 4 or 5 darkest for a tablescape bowl, where variation looks intentional.
Step 5 — String the garland (20 minutes)
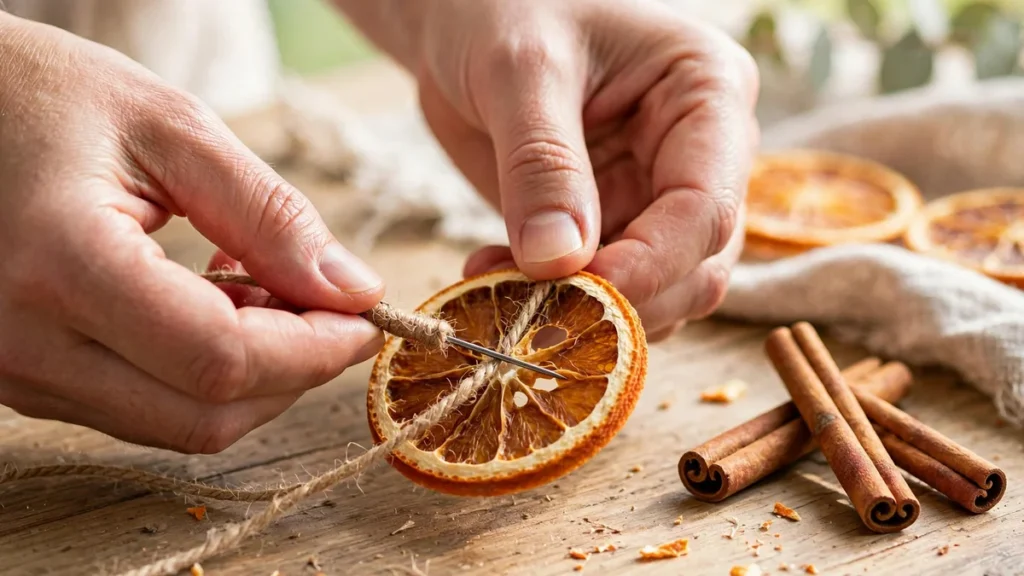
Cut 7 feet of jute twine. Thread the blunt needle and pierce each slice just inside the rind, about 1/4 inch from the edge — never through the centre pith, which tears. Leave 1 inch between slices for a full look, or 2 inches for a lighter strand. Tie cinnamon sticks between every third or fourth slice, and a 6-inch loop at each end.
Shop from Amazon: jute twine
Shop from Amazon: blunt tapestry needles
Step 6 — Hang and adjust (10 minutes)
Hang the dried orange garland across the window, mantel, or tree with small clear hooks or existing nails. Slices should hang flat and catch the light; if one spins sideways, nudge it flat by hand. Active time totals about 1 hour; the rest is oven time.
Troubleshooting: Browning, Tacky Centres, and Curling
Brown slices. The oven was too hot, or slices sat too long after drying. Next batch, drop to 170°F, check earlier, and pull thin slices as soon as they pass the test. Brown slices still suit a tablescape bowl or wreath.
Tacky or mouldy slices. They were not fully dry. Return them to a 170°F oven for 45 to 60 minutes, cool fully, and re-test. Only pack slices that pass the cool-down test, with a silica gel packet if your home is humid.
Curled slices. They dried too fast on one side, usually from sitting unflipped on a hot tray. Flip on schedule, use a wire rack, and press finished slices flat under a heavy book overnight.
Torn slices. The needle went through the centre pith, or slices were still warm. Pierce near the rind with a blunt needle; a torn slice still works as a tree ornament.
Styling: Where a Dried Orange Garland DIY Looks Best
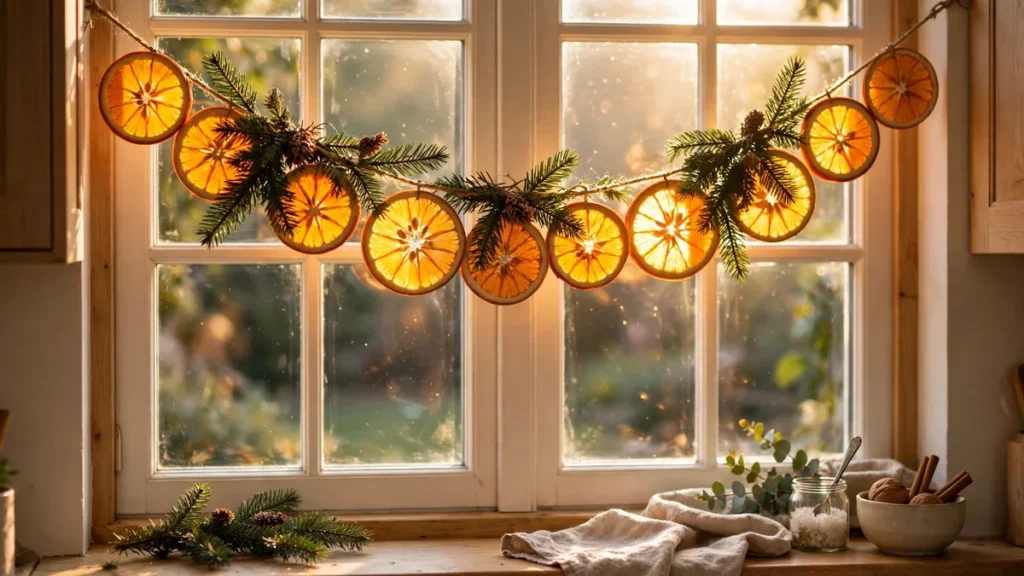
In the window. Backlit slices glow amber on the sill in afternoon sun. It is the look that makes people try this dried orange garland DIY, and the spot where slices last longest, since daylight keeps drying them gently. Pair it with Christmas Window Decor Ideas — the warm layer over greenery or fairy lights.
On the mantel. Drape this dried orange garland in a shallow swag — two gentle dips across a 5-foot mantel look collected, while a taut line looks like a clothesline. Tuck fresh fir behind it. Keep it at least 12 inches from any flame, and never above a lit fire.

Shop from Amazon: jute twine
On the tree. This dried orange garland suits a natural, Scandinavian-leaning tree with wooden ornaments. Wind it loosely, one loop per 2 feet of height, with slices on the outer branch tips so lights shine through.

Shop from Amazon: jute twine
On the table. Lay a short 3-foot strand down the table as a runner, with cinnamon sticks, bay leaves, and pillar candles in glass hurricanes. See Friendsgiving Tablescape for how a natural runner anchors a full table, and Neutral Christmas Decor Ideas if you want the room calm while the slices supply the only warm colour.
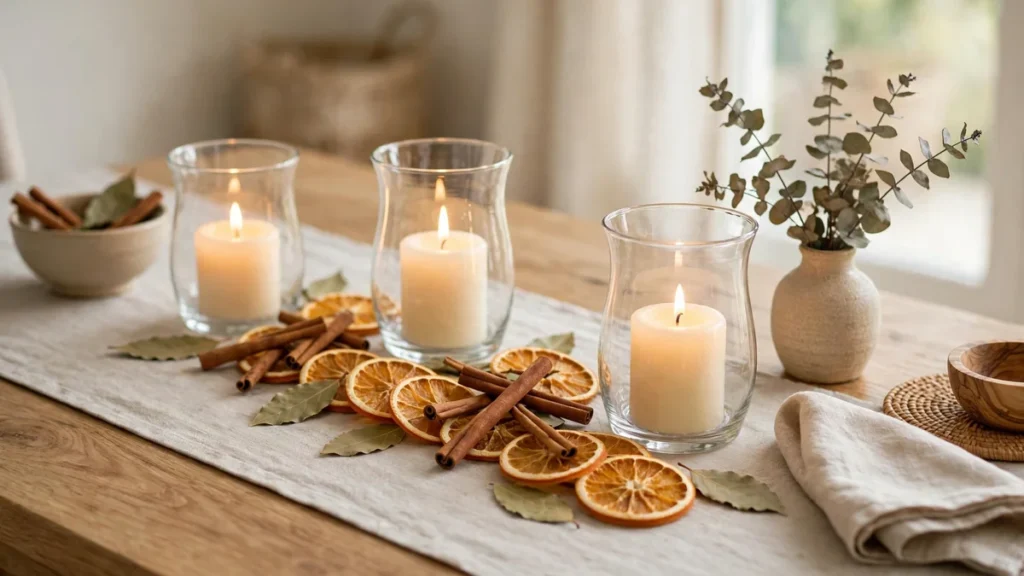
One rule covers all four spots: let the slices be the only loud colour. Adding red berries, gold tinsel, and patterned ribbon at once turns a natural look cluttered.
Storage: Keep Your Slices for a Second Season
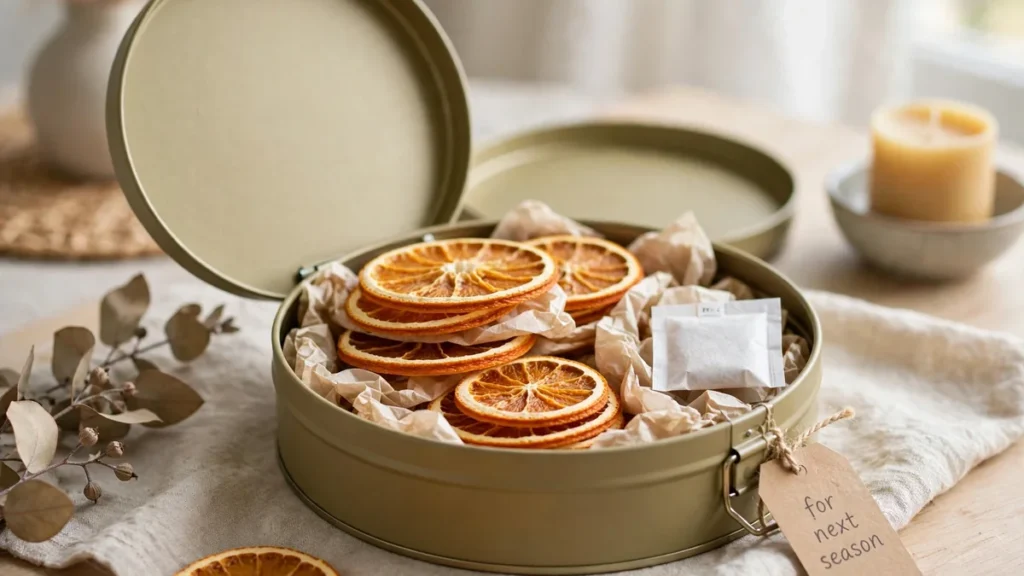
A dried orange garland lasts 6 to 8 weeks on display, and the slices last into a second season if stored right. In January, unstring them and keep only slices still stiff and dry; compost any soft or musty ones. Layer keepers between tissue paper in an airtight tin or zip bag with a silica gel packet, in a cool, dark cupboard — not the attic or garage, where heat and damp ruin them. Next December, restring them; the colour deepens a shade, which suits a second-year garland fine.
A Note Before You Start
I still make a fresh batch every November, even though last year’s slices survive. The smell of oranges in a low oven on a grey afternoon marks the start of the season in my house better than any shop-bought decoration. Make this dried orange garland DIY on a weekend afternoon, put on music, and do not rush the oven.
Frequently Asked Questions
How long do you dry oranges for a garland?
In a low oven at 170–200°F, orange slices take 3 to 5 hours, flipping every 30 to 45 minutes. In a dehydrator at 130–135°F, allow 8 to 12 hours. In an air fryer at 170–180°F, allow 2 to 3 hours in small batches. Slices are done when, cooled for 10 minutes, they feel papery and stiff with no tackiness.
How do you keep dried orange slices from turning brown?
Keep the oven at or below 200°F, slice evenly at 1/4 inch, blot twice before drying, and flip every 30 minutes. Browning in a dried orange garland comes from the fruit’s sugars caramelising at high heat, so low temperature matters more than any other step.
How long does a dried orange garland last?
On display, a dried orange garland lasts 6 to 8 weeks — a full Christmas season. Stored dry in an airtight container with tissue paper and a silica gel packet, slices keep for a second season, though the colour deepens slightly.
Can you make dried orange garland in an air fryer or dehydrator?
Yes. A dehydrator at 130–135°F gives the most even results over 8 to 12 hours. An air fryer at 170–180°F works in 2 to 3 hours, but fits only 6 to 8 slices per batch, so it suits a short window strand better than a long mantel garland.
Sources: Brooklyn Botanic Garden, citrus decorations project; Clemson Cooperative Extension, drying oranges for holiday decorations; Colorado State University Extension, drying fruits.
Supplies: Jute twine for stringing; Blunt tapestry needles, large-eye; Wire cooling racks for baking sheets; Oven thermometer.
FTC disclosure: As an Amazon Associate, Decor & Dish earns from qualifying purchases made through links on this page, at no extra cost to you.